Sunday, July 18, 2010
Lock-down
Just a quick note to say that I am on lock-down studying for the bar exam. As soon as the exam is over, I'm heading to Southeast Asia for a month-long backpacking trip, so you might not hear from me for a while! In the meantime, happy eating!
Monday, July 5, 2010
Surprise Dumplings

I didn't intend on making dumplings when I came up with this filling. I had decided to make a salad wrap with roasted cauliflower, tofu, and red onions, but the liquid from the tofu (which I hadn't pressed) made the vegetables much softer than planned. They were still firm enough for my salad wrap, which was actually rather good, but as I ate it I thought, "These would make great dumplings."
I had to beg Boyfriend to try these dumplings because I made the mistake of telling him they contained cauliflower. Add that to the growing list of vegetables that Boyfriend thinks he doesn't like. After he finally did try one, he said, "Yeah, you're right. These are good. I stand corrected." When he asked, "Do you have more?" I knew these were winners. And when I asked him how many he wanted, he said, "Eight."
These are NOT Asian dumplings. Instead, they're flavored with rosemary and thyme. The maple dipping sauce, which was improvised using a few kitchen staples, is sweet and compliments them well. Boyfriend liked the dipping sauce so much he bragged about it to his friends: "And she made this dipping sauce for them. And guess what the secret ingredient was! Maple Syrup!"
Surprise Dumplings
Note: I don't actually know how many this recipe makes, since I used some of the veggies for my salad wrap, but I would guess it makes over 40 dumplings.
• 1 head cauliflower, cut into florets
• 1 red onion, diced
• One 14-ounce block extra-firm tofu, cut into bite-sized cubes
• 2 tbsp olive oil
• 2 tbsp dried rosemary
• 2 tbsp dried thyme
• package of gyoza wrappers (I used vegetable gyoza wrappers)
Special tool: Dumpling press (You can make the dumplings by hand, but using a dumpling press is so much easier, and the dumplings end up looking beautiful!)
Put the cauliflower florets, red onions, and tofu cubes in a baking dish, and toss them with the olive oil, rosemary, and thyme. Bake them at 425° for 1 hour, then remove from the oven. (Watch out for the steam!)
Let the veggies and tofu cool, then pulse them in a food processor to make a coarse mixture. Fill a small bowl with a bit of water to moisten your fingers. Place a gyoza wrapper on a dumpling press, dip your finger in the water, and trace the perimeter of the gyoza wrapper with your finger. (Getting the edge of the wrapper wet helps the wrapper stick together.) Place about one tablespoon of filling in the middle of the wrapper, and then close the dumpling with the dumpling press. Continue until you have used up all of the filling.
You can freeze the dumplings for later use, or go ahead and cook them according to the directions on the gyoza wrapper package. Serve them with the Maple Dipping Sauce.

Maple Dipping Sauce
• 1 tbsp rice vinegar
• 1 tbsp reduced-sodium soy sauce or tamari
• 1 tbsp medium maple syrup
Mix the ingredients together in a small bowl, and use as a dipping sauce.


My dumpling-making set-up
Saturday, June 26, 2010
Spicy Noodles with Cabbage and Edamame

(Note: This is actually a post from March that I saved as a draft and never posted. Since I came across it today, I thought I'd go ahead and publish it.)
Life has been incredibly hectic lately. Life is normally hectic, but the last few weeks have been abnormal. With vacation, visiting Boyfriend in Houston, and an unexpected trip home, I've been flying about twice a week. I haven't had much time to cook, and many of the dishes I've made lately have been sadly uninspired. BUT tonight I finally made a stir fry worth posting! This is one perfectly spicy stir fry- just spicy enough to make my nose run a bit and my lips swell slightly. It would probably make my mom cry, though, so be careful if you're not a fan of the heat and cut back on the sriracha.
Spicy Noodles with Cabbage and Edamame
Makes 2 servings
• 2 cups sliced red cabbage
• 1 cup frozen edamame
• 2 servings cooked soba noodles
• 2 tsp Asian chili oil
• 2 tbsp soy sauce
• 2 tbsp rice vinegar
• 2 tsp sriracha
• 2 tsp minced ginger
In a nonstick pan, stir-fry the cabbage and edamame in the chili oil over medium-high heat, letting the edamame and cabbage brown just slightly. Mix the soy sauce, rice vinegar, sriracha, and ginger in a small bowl. Add the sauce and the cooked soba noodles to the cabbage and edamame, and heat the noodles until they absorb the sauce.
Wednesday, June 23, 2010
More from Viva Vegan!
Greetings from Planet Houston!

(The astronaut cow statue at Houston's IAH airport)
I'm back in Houston after having to testify in a trial in New York City. I had forgotten how much I loved New York's vegan food. During the short time I was there, I ate at Candle Café and Blossom, two of my very favorite restaurants. I love Houston, but I don't know if a day will ever come that I can go out for a nice fancy dinner and order seitan in a port wine-mushroom sauce. A girl can always dream.
In the spirit of yummy vegan food, here are the results of my most recent projects from Viva Vegan! As I mentioned in a previous post, I made the Red Chile Sauce (page 45) and wanted to use it in the Red Chile Enchiladas (page 135). To do so, I also had to make the Steamed Red Seitan (page 34) and Pine Nut Crema (page 45).
The Steamed Red Seitan didn't look like I thought it would; it was more tan than red.

I eventually realized that I had only used half of the amount of tomato paste that I was supposed to use. Even though I had gone slightly off-recipe, it still turned out delicious. It was shockingly moist. I've heard people talk about meat that falls right off the bone (gross) or melts in your mouth. I imagine this seitan was the vegetarian equivalent.
The recipe yielded twice as much seitan as needed for the enchiladas, so the night before I made the enchiladas I used the seitan to make a quick meal for Boyfriend and I- sautéed seitan, onions, and black beans with yellow rice and avocado. Boyfriend LOVED the seitan. All of the recipes I've made from Viva Vegan! have scored major points with him.

I also made the Pine Nut Crema ahead and refrigerated it until I was ready to make the enchiladas. I tried out the Pine Nut Crema after I made it and was skeptical. I'm not vegan. I'm vegetarian, so I know what cheesy sauces are supposed to taste like. This sauce tasted like tofu mixed with pine nuts. At that point, I had a feeling I was not going to be thrilled with the enchiladas. I made them anyway, and was pleasantly mistaken.

The enchiladas were filled primarily with waxy potatoes and Steamed Red Seitan. They were bathed in the Red Chile Sauce and topped with the Pine Nut Crema. In the interest of full disclosure, I used some low-carb onion and herb tortillas instead of the corn tortillas that were called for. I also ended up only making half of the recipe, since the full recipe would feed six people and I was only cooking for myself: one fresh meal and two quick reheated lunches.

The Red Chile Enchiladas were what I imagine meat enchiladas are supposed to taste like. If I had grown up on this kind of food, or even if I had ever eaten a meat-filled enchilada, I'm sure these enchiladas would make great comfort food. I'm happy to report that the Pine Nut Crema, in combination with the Red Chile Sauce, really did taste like a creamy cheesy sauce. That kind of taste is very hard to accomplish with a vegan recipe, but Master Terry managed, of course. The only down side to this meal is that it does take a lot of effort. Since I made most of the ingredients ahead of time, it came together rather quickly. Still, I think the next time I make enchiladas I might opt for a semi-homemade version using pre-made enchilada sauce and Daiya "cheese" on top.
This cookbook might be too good. I decided to give myself a little distance from it because I've been neglecting so many of my other cookbooks that I want to try out. My newest one, "Silk Road Cooking: A Vegetarian Journey", by Najmieh Batmanglij, has been begging me to experiment with it. So, Latin America may have to wait for a bit while I head over to Persia.
Monday, June 14, 2010
Orange Stir-Fry Sauce
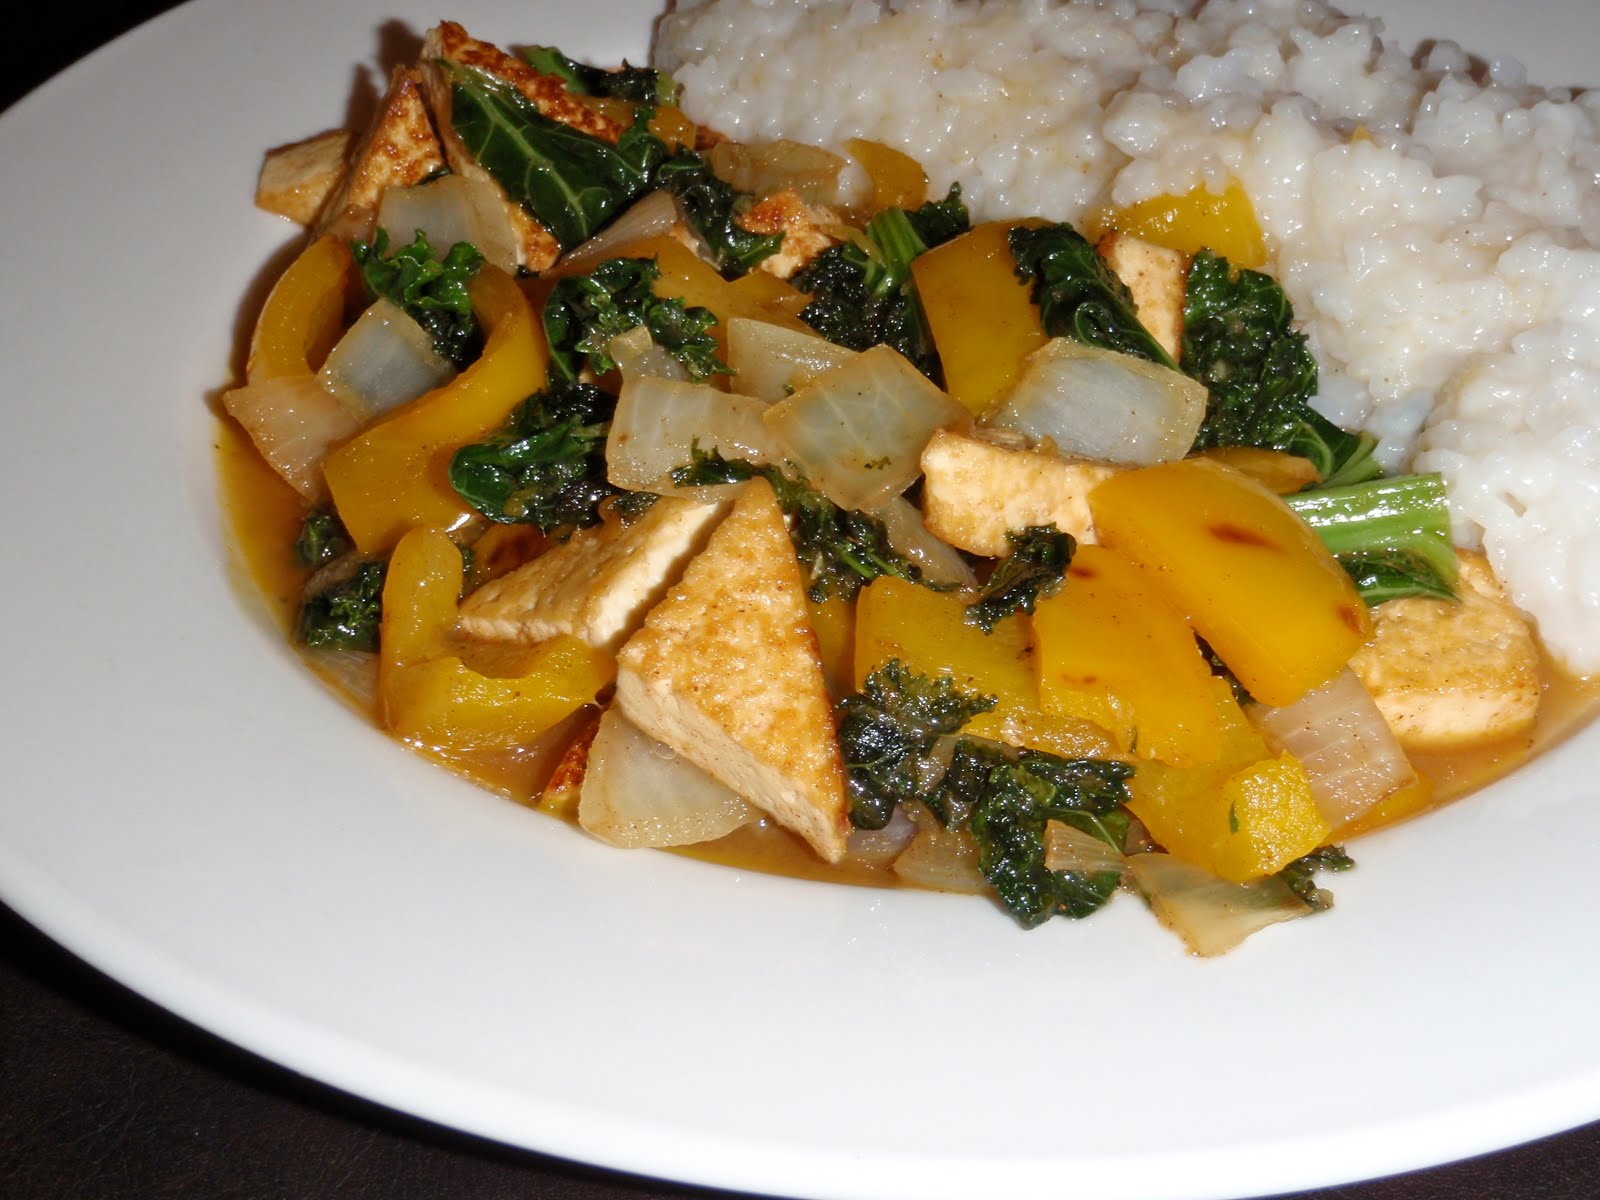
I hadn't intended on posting this recipe. I was just trying to use up a random orange I had in the fridge, but the stir-fry sauce was too good not to share. It was also very, very easy, just the way I like it. I used this sauce with tofu, kale, yellow pepper, and onions, served over coconut rice (recipe to come, once I actually measure everything).
Orange Stir-Fry Sauce
Makes 1 serving
• 1/4 cup freshly-squeezed juice from a naval orange
• 1 tbsp minced ginger (I always have a jar of minced ginger on hand)
• 1/4 tsp ground cinnamon
• 1 tbsp granulated sugar
After sautéing your vegetables in a bit of oil, add the stir-fry sauce and allow to reduce for about 3 minutes. Serve with rice.
Tuesday, June 8, 2010
Mango-Pineapple Tofu

This dish was inspired by Mango Sticky Rice, Boyfriend's favorite dessert. He asked me to make it for dessert one night, but I suggested that I turn it into an entree. I served it with coconut rice, which was also very good, but I plan to tweak the recipe a bit. For now, here's the recipe for our new favorite tofu dish, which Boyfriend described as "the best Thai dish you've ever made." I described it as "heavenly" (not to float my own boat or anything), and loved the way the warm mangoes melted into the dish.
Mango-Pineapple Tofu
Makes 2 servings
• 1/2 cup pineapple juice (can be from the can of pineapple tidbits )
• juice of 1/2 lime (1 tbsp)
• 1 tbsp minced ginger
• 1/2 tbsp chili oil
• 1/2 package extra-firm tofu (7 ounces), cut into bite-sized pieces (pressed if desired)
• 1/2 cup canned pineapple tidbits
• 1 mango, pitted, skin removed, and chopped
• 1/4 cup raw cashews, roughly chopped (roasted would probably work too, but not salted)
• 1 tbsp brown sugar
Mix together the pineapple juice, lime juice, and ginger, and marinate the tofu in the marinade for an hour. Heat the chili oil in a nonstick pan over medium-high heat, then remove the tofu from the marinade and add it to the pan. Stir occasionally. When the tofu is browned, add the pineapple, mango, and cashews. Add the brown sugar to the marinade and pour into the pan. Cook, stirring occasionally, until the liquid is mostly absorbed or evaporated.
Friday, June 4, 2010
Review of Viva Vegan!

Things are starting to settle down. I graduated last week, moved out of my old apartment, and am now officially living in the new place in Houston, but I'm still awaiting the arrival of my belongings. May was a busy month, and the last two weeks I've only cooked a handful of meals for myself. I hate that. Hopefully that will change soon. I have big plans to finally make a dent in my long list of recipes to try out.
For now, I want to gush over the few recipes I did get to try in May. I bought Viva Vegan!, the new Latin cookbook from Terry Romero, and it is truly amazing. I've made 6 recipes, and they have all been fantastic. This is my favorite cookbook. I have over 30. That's a big deal.
First, I made the Quinoa-Oyster Mushroom Risotto (Quinotto) on page 130. It's supposed to be like a risotto with quinoa, but it didn't remind me of risotto at all. No matter, because whatever it was, it was delicious. It was the best quinoa I've ever had, and I've had some damn good quinoa.
The next thing I made was the Chimichurri Baked Tofu on page 100, which required making a batch of the Chimichurri Sauce with Smoked Paprika on page 43. The fresh chimichurri sauce was bright green and tasted very fresh. When baked with the tofu, it took on a darker color and a smoky flavor. I loved the sauce both ways, and had some of the fresh chimichurri on the side with the chimichurri baked tofu and quinotto.

My next project was making the Annato-Infused Oil (Aciete de Achiote) on page 31 and the Yellow Rice with Garlic on page 96. I found the annato seeds at Central Market in Houston. They're bright red and give the oil its orange flavor, which in turn put the yellow in the yellow rice. I don't know how to describe the flavor of annato, I just know that I like it. The oil keeps in the fridge, and during my time off before graduation, I used it to sauté vegetables that I served over the yellow rice. It gave the vegetables something special. The yellow rice was also delicious because of the annato flavor. I'll be making it over and over again. The recipe calls for white rice, which is what I used, but I'm going to see how it turns out with brown rice. I'm sure it'll be quite different, but I do like my whole grains. Below, the yellow rice mixed with mushrooms, spinach, and onions sauteed in annato-infused oil.

The last recipe I tried was the Red Chile Sauce on page 45. I loved this sauce, but haven't found the right pairing yet. I tried it with the yellow rice and sauteed vegetables, and it was good, but not quite right. I made enchiladas with what I had on hand (black beans, mushrooms, and onions) but the flavor of the enchilada filling and the red chile sauce didn't mesh correctly either. Last night I was thinking that this sauce would be better with enchiladas filled with potatoes, spinach, and maybe seitan. Then, I looked in Viva Vegan! and saw the Red Chile Enchilada variation of the Potato-Chickpea Enchiladas with Green Tomatillo Sauce on page 135. Its stuffed with potatoes and the Red Steamed Seitan (which I've yet to try but have heard is, like everything else in this cookbook, fantastic). I think making the Red Chile Enchilada is the solution for what to do with the giant container of red chile sauce in my freezer.

I love this cookbook. Love it, love it, love it. Don't be surprised if you see more of it on this blog. I use most of my cookbooks for inspiration, but I'll continue to be cooking the actual recipes in this one.
Monday, May 17, 2010
Apartment-Warming
Law school has ended and I'm beginning the process of becoming a "real person." Boyfriend and I recently began moving everything from our old Houston apartment to our new Houston apartment, and after I go back up North for graduation I'll have to move everything from my apartment in Boston to our new place. On top of that, I've begun studying for the bar exam. Life is hectic, but wonderful.
An older friend of Boyfriend stopped by our new apartment with his family (including two adorable children), bearing much-welcome gifts. It was so nice to have someone think of us now that I've moved to a new place without many family or friends nearby to welcome me. (Boyfriend, on the other hand, grew up here.) And, luckily for me, Boyfriend's friend and his family are vegetarian, and very good cooks and gardeners.
They brought us this basil plant:

And these cute little soup bowls:
 (My apologies for the cell phone pictures- I left the cord that connects my camera to my computer in Boston.)
As much as I love to cook, yesterday was not the day for it. I nearly cut my finger in half when the cheese I was cutting at lunch slipped, and my knife sliced through the middle of my fingernail. (The universe's way of chastising me for not eating vegan?) Thankfully, our friends brought soup, so there was no need for me to cook. The soup contained rice, daikon, tomatoes, green onions, lime, spinach, tofu, what I think is brown seaweed, lemongrass, and loads of ginger.

I believe these are the first housewarming gifts I've ever received, and I was surprised by how touching I found it. What a nice way to start a new phase of life!
Boyfriend and I intend to return the big soup pot our friends left us by filling it with our own soup. I'm thinking that we should try a recipe from Viva Vegan!, my newest cookbook, which I'm absolutely in love with. I had planned to blog about a few recipes I tried when I was still in Boston, but since I'm missing that camera cord, no dice. Stay tuned.
An older friend of Boyfriend stopped by our new apartment with his family (including two adorable children), bearing much-welcome gifts. It was so nice to have someone think of us now that I've moved to a new place without many family or friends nearby to welcome me. (Boyfriend, on the other hand, grew up here.) And, luckily for me, Boyfriend's friend and his family are vegetarian, and very good cooks and gardeners.
They brought us this basil plant:

And these cute little soup bowls:

As much as I love to cook, yesterday was not the day for it. I nearly cut my finger in half when the cheese I was cutting at lunch slipped, and my knife sliced through the middle of my fingernail. (The universe's way of chastising me for not eating vegan?) Thankfully, our friends brought soup, so there was no need for me to cook. The soup contained rice, daikon, tomatoes, green onions, lime, spinach, tofu, what I think is brown seaweed, lemongrass, and loads of ginger.

I believe these are the first housewarming gifts I've ever received, and I was surprised by how touching I found it. What a nice way to start a new phase of life!
Boyfriend and I intend to return the big soup pot our friends left us by filling it with our own soup. I'm thinking that we should try a recipe from Viva Vegan!, my newest cookbook, which I'm absolutely in love with. I had planned to blog about a few recipes I tried when I was still in Boston, but since I'm missing that camera cord, no dice. Stay tuned.
Saturday, May 8, 2010
Taco Salad: My Comfort Food
When I was in college, my roommate and I would cure our Sunday morning hangovers by going to El Maguey's, a nearby Mexican chain restaurant, for their Sunday specials. I ordered Taco Salad every time "with beans instead of meat, no sour cream, cheese sauce on the side, and a side plate of extra lettuce." I'm not picky at all, obviously.
Now that I don't have the waistline or the metabolism that I had in college, I like making a healthier version at home. I asked for, and received, taco salad baking pans, for my birthday, and they look something like these. I left those pans in Houston, but when I got back to Boston I realized that the pans are unnecessary. You can turn a bowl upside down, spray it with a little Pam, put the tortilla over it, and then bake it for 8 to 10 minutes at 375°.

While the shell is baking, I prepare my ingredients, which always include iceberg lettuce and black beans (Bush's black beans are my favorite). Other ingredients I use, in different combinations, are: avocado; cheese; tomatoes; pico de gallo; cilantro; and sautéed mushrooms, onions, or peppers.


Even though the taco salad bowl makes a very pretty presentation, my favorite part is destroying it and mixing everything up. It always ends up looking like this:

If I run out of tortillas, or I'm just not in the mood for one, I sometimes make the salad with brown rice instead of the tortilla. Lettuce and brown rice is actually a delicious combination that I fell in love with at a small cafe in Buenos Aires. There really are not enough salads out there that have rice in them.
Saturday, April 24, 2010
Whole Wheat Pasta with Roasted Fennel, Mushrooms, and Tomatoes

I did something dangerous a few days ago: I went to the grocery store without a list of what to buy! *gasp* If I can learn to limit my impulse purchases, I really should do this more often. Going to the grocery store without a rigid plan let's me build my meals around what's fresh and on sale. On this trip, the fennel was on sale and also looking particularly fantastic, so I grabbed a bulb and planned out this pasta dish. I'm very pleased with how this dish turned out. The mushrooms are very meaty after being roasted, and the fennel and tomatoes caramelize and taste slightly sweet.
When I head down to Houston in a few weeks, I'm planning on making this dish for Boyfriend, but I'll add artichokes and fresh rosemary. I'll then have to ruin it by adding marinara sauce to Boyfriend's portion, because he doesn't believe in pasta without marinara... To each his own...
Whole Wheat Pasta with Roasted Fennel, Mushrooms, and Tomatoes
Makes 2 large servings
• 3 servings of cooked whole wheat pasta (I used penne and fusilli because that's what i had)
• 1 large fennel bulb, cut into bite-size slices
• 1 pint plum tomatoes, quartered and seeds squeezed out (it doesn't take as long as it sounds!)
• 10 ounces cremini mushrooms, cut in half, or quarters if large
• Olive oil
• Salt and pepper
• 4 ounces of fresh mozarella, optional (without it, this would be vegan)
Preheat the oven to 425° while you prep. Spread the fennel on a nonstick baking sheet and drizzle with olive oil. Bake for 15 minutes. Remove from the oven and add the tomatoes and mushrooms. Drizzle with more olive oil, season with salt and pepper, and toss. Put the baking sheet back in the oven for 15 minutes, then remove and mix the vegetables. Put back in the oven for the final 15 minutes. Remove from the oven and toss the vegetables with the pasta, adding a bit more olive oil, salt, and pepper, to taste. Top with mozarella, if desired.

Monday, April 19, 2010
Recipe Reviews from Vegan Yum Yum
I recently tried out two recipes from the Vegan Yum Yum cookbook: one great, one bad. The first recipe was the Sweet Chili Lime Tofu with Collard Greens and Quinoa:

This tofu dish was delicious- sweet and slightly spicy! The quinoa and sauteed collards were light in flavor, and when I make this again I'd make extra glaze and keep the collards and quinoa simple. The real star was the glazed tofu. Lolo (from the Vegan Yum Yum blog) adds sugar to her sauce for the tofu, which is what makes it "glazey". I rarely add sugar to anything, but after making this dish I've been adding it to my stir fry sauces quite often. I also loved her "tofu geometry"- cutting the tofu into triangles. I am unreaonably finicky about making sure I fry each piece of tofu on at least two sides, and I've found that cutting the tofu into triangles instead of squares really makes it easier to flip the pieces with a spatula.
The other recipe I tried was the creamy broccoli dal, and I'm sorry to say it was very disappointing. I would love to hear whether anyone else has made it and what they thought of it. When I had my first bowl of soup, I thought the spices were lack-luster and the soup was not as creamy and thick as I had expected. I tried the soup again the next day, since broccoli soups tend to be better the next day, but it was just as blah as it was the night before.
Despite my disappointment in the Creamy Broccoli Dal, I still wholeheartedly recommend Vegan Yum Yum's cookbook. Soon after I bought the book, I made the Red and White Cauliflower Bake and the Baked Mac and Cheeze. The Mac and Cheeze was pretty good (although not as good as the real thing), but the Red and White Cauliflower Bake was AMAZING. It has a layer of marinara sauce, then creamy cauliflower, tofu ricotta and finally bread crumbs on top. It was so creamy that eating it felt sinful, but when I calculated out the nutrition facts it wasn't too bad: about 480 when the casserole is divided into 4 large servings.
I recommend you check out www.veganyumyum.com, if you haven't already. If you like what you see, buy the cookbook!
Thursday, April 1, 2010
Vegan Spinach-Shiitake Sushi Risotto

I had already started sautéing an onion in a big pot, so I threw in some minced garlic and checked out my fridge and pantry to see what I could do with what I'd started. My first thought was risotto, but I didn't have any Arborio rice. I did have sushi rice though- so why not? I also had the spinach I was planning to use for the barley dish, some vegetable broth, and a bag of frozen, sliced shiitakes. (I found a 10-ounce bag at Whole Foods for $3.39!) I used these items to make my "risotto", then added in some Daiya "cheese" that I recently discovered at Whole Foods. (By the way, have I mentioned I love Whole Foods?)
The result was fantastic. The texture was creamy, and there really was not much of a difference between this sushi risotto and more traditional risotto. In fact, I think I'll probably use sushi rice for risotto from now on. Using it instead of Arborio rice would keep me from overstocking my pantry (a problem I'm currently battling), and sushi rice is usually easier for me to find at a bargain.
Another awesome thing about this risotto: It's BRIGHT green! Dad and I should have made this for St. Patrick's Day!
Vegan Spinach-Shiitake Sushi Risotto
• 1 1/2 tbsp olive oil
• 3 cloves garlic, minced
• 1 small onion, finely chopped
• 1 cup sushi rice
• 2 cups frozen, sliced shiitake mushrooms
• 1 cup packed spinach
• 1 cup water
• 2-3 cups (?) vegetable broth (I didn't measure and usually don't, I just go by when the risotto is the consistency I want)
• 1/2 cup Daiya dairy-free cheese
In a large saucepan, heat 1 1/2 tbs olive oil over medium heat. Add the garlic and onion and sauté until the onion is translucent. Add the sushi rice and toss it in the olive oil. Add enough vegetable broth to cover the rice and stir occasionally, letting the rice absorb the broth. Measure the shiitakes, chop up any large slices, and add them to the rice. Blend the spinach and water, then add it to the rice. Stir slowly while letting the rice absorb the the spinach-water. Once that has been absorbed, add more vegetable broth until the rice is cooked and creamy. Stir in 1/2 cup Daiya "cheese" and chow down!
Wednesday, March 31, 2010
Rooster Sauce
It's amazing to me that after years of cooking for myself almost daily, I still often find new cooking techniques and new ingredients to fall in love with. Right now my obsession is Sriracha sauce, a.k.a. Rooster Sauce, a Thai hot sauce. I've been making a simple spicy stir fry sauce of 1 part Sriracha sauce, 3 parts reduced sodium tamari, and 3 parts rice wine vinegar (that is, 1 tsp: 1 tbsp: 1 tbsp). I stir fry my main ingredients in Asian chili oil, hot toasted sesame oil, or peanut oil, then add my spicy stir fry sauce at the end. It's so simple that it might seem silly to blog about, but if you eat as much stir fry as I do and Sriracha isn't one of your kitchen staples, go buy a bottle NOW!
Soba noodles, broccoli, and tofu with spicy stir fry sauce:


Soba noodles, broccoli, and tofu with spicy stir fry sauce:

Soba noodles, red cabbage, and edamame with spicy stir fry sauce:

Brown rice sushi with various fillings, including a drizzle of Sriracha sauce:

Monday, March 22, 2010
Spring Greens Risotto (a recommended recipe)
I visited my parents in Kansas City while I was on spring break from law school last week. My first day at home, I noticed a recipe that my dad had printed off foodnetwork.com sitting on the dining room table. It turned out to be Ina Garten's recipe for Spring Greens Risotto, a recipe that I had made last summer and LOVED. My dad had picked it out for us to make for St. Patrick's Day dinner because of all the green veggies. It was even better than I remembered, and we loved the bright citrus-flavor and creamy texture. You can get the recipe here, but for your convenience I've also posted it below (with vegetable broth instead of chicken stock).
• 1 1/2 tablespoons good olive oil
• 1 1/2 tablespoons unsalted butter
• 3 cups chopped leeks, white and light green parts (2 leeks)
• 1 cup chopped fennel
• 1 1/2 cups Arborio rice
• 2/3 cup dry white wine (I believe we used a Torrontes)
• 4 to 5 cups simmering vegetable broth (if you don't want to keep an extra pot simmering, that's okay, it just might take a little longer)
• 1 pound thin asparagus (make sure to trim off any thick, woody bottoms)
• 10 ounces frozen peas, defrosted, or 1 1/2 cups shelled fresh peas
• 1 tablespoon freshly grated lemon zest (2 lemons)
• Kosher salt and freshly ground black pepper
• 2 tablespoons freshly squeezed lemon juice
• 1/3 cup mascarpone cheese, preferably Italian
• 1/2 cup freshly grated Parmesan, plus extra for serving if desired (I didn't think it necessary)
• 3 tablespoons minced fresh chives, plus extra for serving
Heat the olive oil and butter in a medium saucepan over medium heat. Add the leeks and fennel and saute for 5 to 7 minutes, until tender. Add the rice and stir for a minute to coat with the vegetables, oil, and butter. Add the white wine and simmer over low heat, stirring constantly, until most of the wine has been absorbed. Add the vegetable broth, 2 ladles at a time, stirring almost constantly and waiting for the stock to be absorbed before adding more. This process should take 25 to 30 minutes.
Meanwhile, cut the asparagus diagonally in 1 1/2-inch lengths and discard the tough ends. Blanch in boiling salted water for 4 to 5 minutes, until al dente. (If you're wary of having several pots going on at once, you can cook the asparagus before you start the arborio rice). Drain and cool immediately in ice water. (If using fresh peas, blanch them in boiling water for a few minutes until the starchiness is gone.)
When the risotto has been cooking for 15 minutes, drain the asparagus and add it to the risotto with the peas, lemon zest, 2 teaspoons salt, and 1 teaspoon pepper. Continue cooking and adding stock, stirring almost constantly, until the rice is tender but still firm.
Whisk the lemon juice and mascarpone together in a small bowl. When the risotto is done, turn off the heat and stir in the mascarpone mixture plus the Parmesan cheese and chives. Set aside, off the heat, for a few minutes, sprinkle with salt and pepper, and serve hot with a sprinkling of chives and more Parmesan cheese (optional).
Tuesday, March 16, 2010
Happy (early) St. Patrick's Day!
I swear I'm not gone for good. Life has been crazy this semester, but it should be slowing down a bit soon. I've been traveling twice a week for the past few months, so I haven't had time to do much cooking. An illness in the family (he's all better now, thankfully!), visiting Boyfriend in Houston, and working on a motion to dismiss in a death penalty case have also been keeping me too busy (and sadly uninspired) to post anything worthwhile. I'm feeling some inspiration coming back to me, though, so please stay tuned.
For now, if you're looking for a St. Patrick's Day dessert, I wholeheartedly recommend my Chocolate Guinness Cake! I'll be making it tomorrow upon my sister's request.

For now, if you're looking for a St. Patrick's Day dessert, I wholeheartedly recommend my Chocolate Guinness Cake! I'll be making it tomorrow upon my sister's request.

Sunday, January 31, 2010
Pistachio-Crusted Tofu with Shredded Brussels Sprouts

This recipe arose from a big bag of pistachios and a craving for Brussels sprouts. Don't be put off by the monochromatic picture; it looks better in person and could easily be accompanied by other colorful sides (mashed sweet potatoes, maybe?) if you're concerned about presentation. I served mine with some brown rice I had on hand. The tofu is crunchy on the outside and creamy on the inside, and the shredded Brussels Sprouts are a tangy accompaniment. If you don't want to use nutritional yeast, I'm sure that bread crumbs would work. In place of the champagne vinegar, you could also try white wine or a bit of lemon juice.
Pistachio-Crusted Tofu
Makes 1 serving
• 1/4 cup pistachios, ground or chopped
• 2 tbsp nutritional yeast
• 1/4 package (2 ounces) extra-firm tofu, patted dry and cut into 2 slabs
• 1 tbsp dijon mustard
Preheat the oven to 400°. Mix the pistachios and nutritional yeast on a plate. Coat each piece of tofu with the honey mustard (you probably won't need all of it- just enough for the coating to stick). Coat the tofu in the pistachio and nutritional yeast mixture. Place the tofu on a nonstick baking sheet and bake for 20 minutes, turning once.

Shredded Brussels Sprouts
Makes 1 serving
• 1 cup shredded Brussels sprouts (about 5 medium)
• 1 tsp olive oil
• 2 tsp champagne vinegar
• salt and pepper to taste
Sauté the shredded Brussels sprouts in the olive oil. Test a piece of the base of a cabbage, and once the sprouts are cooked through, turn off the heat and toss the sprouts in the champagne vinegar. Add salt and pepper to taste.

Wednesday, January 27, 2010
Fig, Blue Cheese, and Pistachio Salad Wrap

I don't think I had ever made a salad wrap before this week, but I've been making them every day for lunch recently. They can be put together so quickly, and are easy for me to take to campus when I don't have time to go home for lunch. Since my last post, I've come up with a better way to make the wrap, and that is to wrap it up in aluminum foil as I roll it. It allows me to transport the wrap without the salad falling out of one end since I like to keep one end open (which lets me put more salad in it). As I eat the wrap I peel the foil off in layers, and the wrap stays together beautifully.
This morning, right before I made the day's salad wrap, I told my roommate that I was developing an obsession with them, and her response was: "Eww!" But I explained that these are fancy salad wraps, not the Caesar-soaked lettuce wrapped in a tortilla that you'd find at one of our law school lunches. (That is, before the economy tanked and we stopped getting free food) She had to agree that lavash bread wrapped around spring greens, dried figs, blue cheese, and pistachios is an entirely different species of wrap.
If you have a Trader Joe's in your area, that would be a great place to get the main ingredients for your dish. They sell everything except the vinaigrette, and at great prices. If you don't want blue cheese, I think goat cheese and fresh mint would be a great substitution.
Fig, Blue Cheese, and Pistachio Salad Wrap
Makes 1 wrap
• 1 lavash bread
• a couple handfuls of spring greens
• 5 dried black mission figs, sliced
• 3 tbsp dry roasted pistachios
• 3 tbsp crumbled blue cheese
• 2 tbsp Champagne-Shallot Vinaigrette
Mix it. Wrap it. Eat it.
Makes 1 wrap
• 1 lavash bread
• a couple handfuls of spring greens
• 5 dried black mission figs, sliced
• 3 tbsp dry roasted pistachios
• 3 tbsp crumbled blue cheese
• 2 tbsp Champagne-Shallot Vinaigrette
Mix it. Wrap it. Eat it.
Monday, January 25, 2010
Exotic Salad Wrap with Champagne-Shallot Vinaigrette

This salad wrap and dressing was inspired by the Mixto Exotica Salad at Julia's Bistro in Houston, Texas. The Mixto Exotica is a bed of greens with mango, papaya, pineapple, diced red pepper, plantain chips, and a Tahitian vanilla-shallot vinaigrette. Even though I'm not a big fan of fruit, this was the best salad I've ever had. I made my own version of the vinaigrette which I first used on a salad of mixed greens, roasted beets, goat cheese, and mint. This time I went with a salad wrap that is a lot closer to the spirit of the Mixto Exotica.
Since I'm usually only cooking for myself and this dressing does take more effort than just mixing up some vinegar and oil, I make a batch and then freeze it. It is completely worth the little bit of effort required to make this light, sweet, unique dressing. I hope you'll give it a try!
Champagne-Shallot Vinaigrette
Makes about 1 cup
• 6 medium shallots, diced
• 3 tbsp olive oil
• 1/2 cup champagne vinegar
• 1 tbsp honey
• 1 tbsp vanilla extract
Dice the shallots and sauté them in 1 tbsp olive oil. Blend the shallots and the rest of the ingredients in a blender until smooth.
Makes about 1 cup
• 6 medium shallots, diced
• 3 tbsp olive oil
• 1/2 cup champagne vinegar
• 1 tbsp honey
• 1 tbsp vanilla extract
Dice the shallots and sauté them in 1 tbsp olive oil. Blend the shallots and the rest of the ingredients in a blender until smooth.
Exotic Salad Wrap
Makes 1 wrap
• 1 piece lavash bread
• a couple handfuls of spring greens mix
• 1 mango, peeled, pitted, and diced
• 1 ounce plantain chips
• 1/2 yellow bell pepper, diced
• 2 tbsp Champagne-Shallot Vinaigrette
Mix the salad ingredients (everything except the lavash bread) with the dressing. Lay the lavash bread with the longest side running from left to right on a flat surface and top it with the salad mixture, leaving about two inches uncovered around the bottom and the right side. Roll up the lavash bread from left to right.

Friday, January 22, 2010
Amy's Low Sodium Cream of Tomato Soup

Amy's Low Sodium Cream of Tomato Soup is the best tomato soup I have EVER had. It's so good that I had to take a picture of it with my iPhone while I was at my internship, and then immediately blog about it.
I had bought the low sodium kind because Whole Foods was having a sale. I did not miss the salt at all- although I did add a few whole grain saltine crackers, so take that for what it's worth. It's a sweet, thick tomato soup that, despite the word "creamy" in the title, doesn't seem to have much cream in it. The creaminess seems to come more from the sun-ripened tomatoes than it does from the cream.
My favorite thing about this soup is that it's flavorful enough on it's own to be the star of the meal. I think that's rare with canned tomato soups. I usually think of tomato soup as an accompaniment to grilled cheese. Not this one. If you want a grilled cheese with it, you better class it up and make it with rosemary focaccia and smoked gouda.
By the way, I licked the bowl.
Wednesday, January 20, 2010
Veganomicon-Inspired Tomato Couscous

I love "Veganomicon" by Isa Chandra Moskowitz and Terry Hope Romero. One of my favorite recipes I've made from it is Tomato Couscous with Capers. Boyfriend wasn't a big fan, but I like it enough that I'll make it for us whether he eats it or not. A few nights ago I had planned on making the original version, but I was feeling too lazy to chop an onion or add spices. Instead, I tweaked the recipe a bit, mainly by using fire-roasted tomatoes instead of regular diced tomatoes. 3 ingredients and barely any work later, here you go:
Veganomicon-Inspired Tomato Couscous
Makes 4 side-dish servings
• 3/4 cup whole wheat dry couscous
• One 14-ounce can diced fire-roasted tomatoes
• 2 tbsp capers, drained
Drain the liquid from the fire-roasted tomatoes into a measuring cup and reserve the tomatoes. Pour 3/4 cup of the liquid into a pot and bring to a boil over medium-heat. If you don't get 3/4 cup of liquid from the tomatoes, add however much water or vegetable broth you need to make it 3/4 cup. (My can of tomatoes yielded almost exactly 3/4 cup liquid.) Add the capers, tomatoes, and couscous to the liquid. Remove the pot from the heat, stir, and cover with a lid. The couscous is ready once the liquid is absorbed, which will take less than 5 minutes.
Nutrition Facts: 135 calories, 0.6 g fat, 0 g saturated fat, 0 mg cholesterol, 384 mg sodium, 29.9 g carbohydrates, 5 g fiber, 5 g protein.
Monday, January 18, 2010
Seitan with Spinach, Sun-Dried Tomatoes, and Kalamata Olives

I love when I can make a quick, flavorful meal with only a few ingredients. A lot of these ingredients are left over from the pastry-topped portabellos that I made a few nights ago. The kalamata olives and sun-dried tomatoes really stand out in this dish.
Seitan with Spinach, Sun-Dried Tomatoes, and Kalamata OlivesMakes 1 serving
• 1 tbsp Earth Balance margarine
• 4 ounces (1/2 package) seitan, broken into bite-sized pieces
• 1 cup packed baby spinach, rinsed and drained but not dried
• 5 sun-dried tomatoes, soaked in hot water until softened, then finely chopped
• 2 tbsp kalamata olive tapenade
Heat a nonstick pan over medium-high heat. Add all of the ingredients and cover. Stir occasionally, until the spinach is wilted.
Nutrition Facts: 339 calories, 20.5 g fat, 0 mg cholesterol, 974.3 mg sodium, 15.6 g carbohydrates, 24.5 g protein
Sunday, January 17, 2010
Pastry-Topped Portabellos

I made Pastry-Wrapped Portabellos from 1,000 Vegan Recipes for Thanksgiving, and Boyfriend LOVED them. I didn't have a rolling pin in Houston, so the pastry wrapping was pretty thick. Too thick for me, but just fine for Boyfriend. When I decided to make my own version of the portobellos last night, I had the same problem. No rolling pin, and no time to go buy one. That's why this dish is called "Pastry-Topped Portabellos". I thought one layer of pastry dough would be a better pastry-to-portabello ratio. Plus, this method is much faster and easier.
These ingredients are a pretty classic combo, so you could do a lot with any leftover ingredients. I think I'm going to make a pasta with them.
Pastry-Topped Portabellos
Makes 2 servings
• 2 large portabello mushroom caps
• olive oil
• 1/2 cup packed baby spinach leaves
• 7 sun-dried tomato halves (not packed in oil)
• 2 tbsp kalamata olive tapenade
• 2 tbsp goat cheese
• Frozen pastry sheets (you won't need a full package or even a full sheet)
Thaw the frozen pastry sheets for 40 minutes.
Preheat the oven to 400°.
Put the sun-dried tomatoes in a bowl of very hot water to soften.
Remove the stems from the portabellos and set aside. Scrape out the gills with a spoon and discard. Heat a nonstick pan over medium-high heat, add a splash of olive oil, and add the portabellos, stem-side up. Cook the portabellos, adding more oil if necessary, turning once. When they have softened and cooked through, lay them stem-side down on a paper towel to cool and dry.
Finely chop the portabello stems. Rinse the baby spinach but do not dry. Add the portabello stems and spinach to the same pan, and sauté until the spinach is wilted and the stems are cooked. Remove from heat.
Remove the tomatoes from the water and chop finely. Mix together with the portabello stems, spinach, tapenade, and goat cheese.
Place the portabello caps stem-side up on a nonstick baking sheet. Fill each one with half of the filling. Cut squares from the pastry-sheet that are just big enough to cover the tops of the portabellos. Press them on top of the stuff portabellos and cut two slits in the top. Put the topped portabellos in the oven and bake for 15 minutes, or until the pastry is golden. Eat them soon after they come out of the oven, but do give them a little time to cool.
Saturday, January 16, 2010
Sweet Potato and Cauliflower Curry
 I gained about eight pounds during my summer of clerking at two law firms and having extravagant lunches, big dinners, and too many cocktails for 12 weeks. When the summer ended, I lost 3 pounds of my summer weight by just getting back to my normal eating and drinking habits, but in mid-November I decided I needed to work harder at getting rid of my summer baggage and the 6 pounds I had already gained in law school.
 During the past two months, I've lost 7 pounds. That's not a huge number, but it's a healthy number. And I think it's pretty damn good considering that during that time period, I celebrated Thanksgiving, Christmas, and New Year's Eve without really holding back on those days. A HUGE factor in my weight loss has been exercise, but diet has also been an important part of it. I've been trying to use less oil in my cooking and have paid much more attention to my portion sizes. I'm also always looking for new, healthy, dishes that will fill me up without all the calories. This curry is one of those dishes.
A 1-cup serving of this curry has about 174 calories, 6.9 g fat, 3.6 g saturated fat, 0 mg cholesterol, 458 mg sodium, 26.3 g carbohydrates, and 5.9 g protein (but this may vary somewhat depending on what coconut milk you use and how much salt you add). And, it's loaded with vitamins and minerals. Some people may be put off by the coconut milk because of the saturated fat- but come on people, everything in moderation!
This is a mildly spiced curry, but you could definitely make it spicier by adding peppers. It has a creamy texture from the coconut milk and sweet potatoes, but a little crunch to it from the cauliflower. I ate a serving of this curry for lunch today with a serving of brown basmati rice. A 314-calories meal and I'm stuffed and happy!
Sweet Potato and Cauliflower Curry
Makes 6 1-cup servings
• One 14-ounce can light coconut milk
• 1 tsp ground cardamom
• 1 tsp ground cinnamon
• 1 tsp curry powder
• 2 tsp brown sugar
• 1 tbsp crushed red pepper flakes
• 1 large sweet potato, cut into about 1/2-inch cubes
• 1 head cauliflower, cut into bite-sized florets
• One 14-ounce can chickpeas, drained and rinsed
• salt to taste (I added 1/2 tsp- it didn't need much)
In a large pot (I didn't have a pan big enough), add the coconut milk, cardamom, cinnamon, curry powder, brown sugar, and red pepper flakes and heat over medium-high heat. When the coconut milk is simmering, add the sweet potato and toss to cover with the sauce. Cover the pot and let simmer for about 10 minutes. When the sweet potatoes can be easily pierced with a fork, but before they've turned to mush, add the cauliflower and chickpeas. Toss the mixture with the sauce, and cover, continuing to simmer. Stir occasionally. The curry is ready when the cauliflower is cooked. The sweet potatoes should have broken up into the sauce, with some small pieces here and there. Salt to taste, and serve.
Friday, January 15, 2010
My first soy yogurt smoothie

Even though I haven't been eating vegan lately, I've been trying to buy fewer dairy products. When I decided to make Indian food, I bought plain soy yogurt instead of the plain yogurt I used to buy. To use some of it up, I made this smoothie with 1 cup soy yogurt, 1/2 cup frozen blueberries, and 1 cup strawberries. I'm not a big fan of blueberries (I was just trying to use up some that Boyfriend had bought), but the soy yogurt is a winner! The smoothie ended up sweeter than if I had used silken tofu, and it didn't have that something's-not-quite-right-here taste that my silken tofu smoothies sometimes have. Silken tofu, you have officially been replaced.
Thursday, January 14, 2010
Mint Cucumber Raita

This is not a very original recipe (nor is it a very good pic- sorry). I was dreaming up a swiss chard wrap and was trying to think of a sauce I wanted to go with it. "Chard tastes like beets... what's good with beets? Mint and goat cheese... but maybe yogurt instead of the goat cheese. Mint and yogurt... and cucumber. Cucumber would be good with that. It would be like a mint cucumber raita! Oh wait, that exists already." Even though this is not a creative sauce, I want to give you the recipe anyway because it is a sauce worth making. 3 ingredients and very little prep time yield a cool, refreshing sauce that can compliment a spicy dish or enhance a milder one.
Mint Cucumber Raita
Makes about 5.5 ounces
• 1/2 cucumber, peeled, grated, and squeezed of excess liquid
• 1/2 cup soy (or regular) yogurt
• 1/4 cup finely chopped mint
Once you mix the ingredients, this sauce is ready to go. This will yield a fairly thick sauce, but keep in mind that if you put it in the fridge and use it the next day, the cucumber will have released more water into the yogurt and will be runnier. I used some two days after I made it and the sauce was thinner, but still went very well with my lunch of rice, pigeon peas, and red pepper seitan.
Wednesday, January 13, 2010
Red Pepper Seitan

The picture above is what I took for lunch today for my internship: red pepper seitan, brown basmati rice, and sweet-and-sour toovar dal. The toovar dal is from Madhur Jaffrey's "World Vegetarian". I think I did something wrong (maybe I wasn't supposed to drain the pigeon peas, but there was just way too much liquid!) but they were still pretty good.
This Indian-inspired red pepper seitan dish was really easy to prepare and only uses 5 ingredients. It's high in protein and doesn't contain any oil other than that already in the seitan. On top of that, it's so yummy!
Red Pepper Seitan
Makes 4 small servings
• 1 red bell pepper, cored, seeded, and roughly chopped
• 1 serrano chili, stem end cut off and roughly chopped (don't remove the seeds)
• 1 pound seitan (I used West Soy traditional seitan because I didn't feel like making any)
• 1/4 cup plain soy yogurt (or regular plain yogurt if you don't care whether it's vegan)
• 1/4 cup chopped cilantro
Put the red pepper and serrano chili into a blender and blend into a smooth sauce. (If you taste it at this point, it will be REALLY spicy, but it will cool down!) Pour the sauce into a pan, add the seitan, and heat over medium-high heat until most of the liquid has evaporated. Stir in the yogurt and cilantro, and remove from heat. If you plan to serve this with rice, you might want to make extra sauce, especially if reheating it as a leftover.

Thursday, January 7, 2010
Life Without Cooking
I haven't had many chances to cook a real meal in the past month. December is often like that because of finals and the holidays. My mom does the cooking (even though she hates doing it), and I do the eating. I had been looking forward to the chance to try some new recipes once the new year started, but instead I opened 2010 with a case of food poisoning. It only lasted a day and a half, but I haven't had what I'd consider a "real meal" (grain + vegetables + protein) since then. Tomorrow I head to Dallas for a wedding, so I won't be cooking for myself until next week. For now, I'm occupying my spare time by fantasizing about what I'll cook myself. I might fall back on an old staple like my tofu kale bowl, or try something new from one of my 3 new cookbooks: World Vegetarian, 3o-Minute Vegan, or The Modern Vegetarian Kitchen.
While fantasizing about food and reading about anything food related online, I came across an article by Roger Ebert. A surgery left him unable to eat or drink, and he writes about his memories of food and what he misses the most. Take a look at the article- it's a good read: http://blogs.suntimes.com/ebert/2010/01/nil_by_mouth.html
While fantasizing about food and reading about anything food related online, I came across an article by Roger Ebert. A surgery left him unable to eat or drink, and he writes about his memories of food and what he misses the most. Take a look at the article- it's a good read: http://blogs.suntimes.com/ebert/2010/01/nil_by_mouth.html
Subscribe to:
Posts (Atom)